
Acquisition Date:
The Acquisition date defaults to "Today's Date" when the form is first opened. If Sticky Date in Options is OFF, the form will rest to "Today's Date" after every successful acquisition. If Sticky Date in Options is ON, then the form will maintain the date used during the previous Acquisition.
Use the date picker to select the date of the acquisition if it needs to be changed.
Type:
There are currently six acquisition types:
The default type is New. Use the drop down to select the appropriate type for the acquisition if it needs to be changed.
Acquire from a Vendor
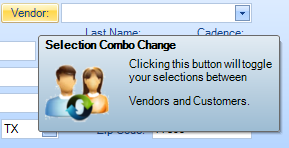
The vendor drop down has focus when the module first opens and is a list of all the vendors that have been entered into the system. You can click the Vendor button to switch to a list of your Customers and back again. When FFL Tools has been newly installed, two options for Vendor are present in the drop down list,

When
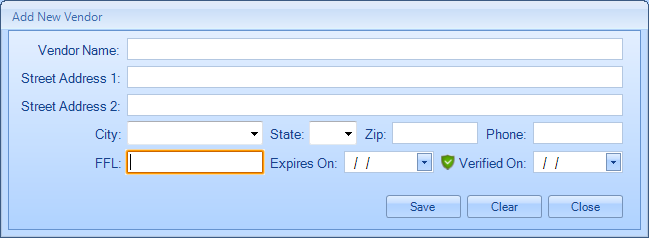
When the Add New Vendor dialog opens the FFL: field will have focus. Just type in the FFL number. Do not type in the dashes (-) and the system will automatically capitalize the one letter. Once the FFL number has been entered press the Verify  that is between the Expires On: and Verified On: dates. (NOTE: Computer must be connected to the Internet for the Verify process to function).
If Use Full FFL Number in Options is set to ON then the complete FFL number is required. If Use Full FFL Number in Options is set to OFF, then only the first three and last five of the FFL Number is required.
By clicking the Verify image, an eZCheck is performed using the FFL number entered. Time needed to perform the eZCheck will depend on the speed of the Internet connection. Upon completion of the eZCheck the Vendor Name, Street Address, City, State, and Zip fields will be filled. There is a place for the vendor phone number if desired.
(Note: The ATF Online eZCheck system returns the address on a single line. If multi line addresses are desired please edit the address as needed.)
Click the Save button and the Add New Vendor dialog will close and control will be returned to the Acquisition Module. The newly added Vendor will be selected.
Additionally you can add a new Vendor from the Acquisition Module by filling out the License Holder FFL Number and clicking the shield icon on the control.

You can choose to sort the Vendor Name combo box by Name or FL Number whichever is more convenient. To change the sort order you would utilize a switch under the Acquisition Options.
When the switch displays  the sort order will be by the Vendor's name. To sort by FFL Number, change the switch till it shows
When you toggle the Vendor button to Customer the fields available on the form change.

If you are Acquiring from a Trust, check the appropriate box under Acquisition Options and the form changes to.

The Add Firearms Panel will be displayed in the bottom portion of the screen.
If the Vendor's FFL has expired, or the FFL Number is not formatted to meet the requirements as determined by the Use Full FFL Number switch in Options, please see help on Using Full or Updating Expired FFL Numbers.

Acquisition Options
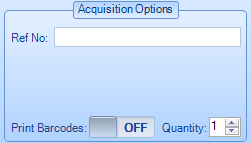
When Acquiring from a Vendor you can specify a Reference Number, be it an Invoice Number or Purchase Order. This Reference number can be used later if you are then Disposing an entire Reference Number. There is also a Vendor / Reference Report where you can group firearm data by the Vendor it was Acquired from, and the Reference Number it was associated with.
If you have a DYMO Printer connected to your computer and have configured the DYMO Printer Modules under options you can print barcodes of the firearms you are Acquiring.
Acquire from a Non Licensed Individual
Fill in the First, Middle, Last Name, and select a Cadence if applicable of the individual that the firearm is being acquired from. Pressing the Tab or Enter key on the keyboard will move the cursor to the next field.
Fill in the Street Address information. If you press Tab / Enter to leave Street Address 2 the cursor moves to the Zip Code: field. By typing in the zip code the City and State will auto fill. Some zip codes contain more than one City. Use the City drop down list to correct City if needed.
Remember to set the Acquisition Type appropriately.
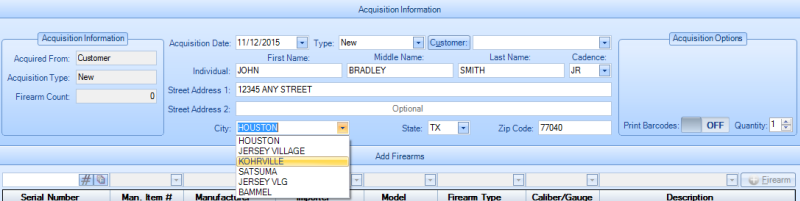
The Vendor label is now a button which will toggle between your Vendors and your Customers. Please refer to in application tool tip for additional information.
Add Firearm Fields
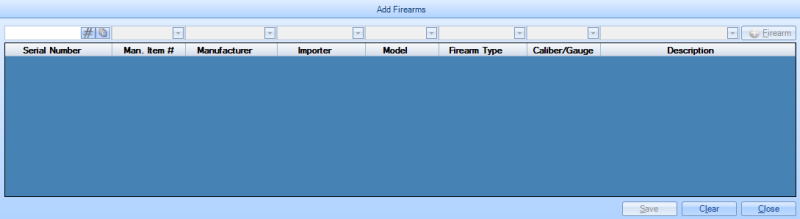
All fields except the Serial Number field make use of drop down lists. These drop down lists are populated with data found in the Bound Book. For a new installation the drop down lists will be empty. As firearms are added to the Bound Book the drop down lists will be populated. There are several methods of using a drop down list:
Both methods work equally well and the person using the application can decide which method works best for them. Remember, if an item does not exist in the drop down list, just enter the desired value and press tab / enter. Once the firearm record is saved in the Bound Book that item will be available for future acquisitions. The drop down list allows the FFL to see values that have been previously entered allowing for consistency in data entry.
Note: If you have a scanner which returns an enter key stroke at the end of the scanning, this works very well for entering Serial Number and Man. Item # from barcodes provided by the Manufacturer.
By selecting an existing Man. Item # the remaining firearm information will be entered by the system.
Example: Use a period in front of all calibers that use inch measurements and two lower case "mm" for metric calibers.
After entering all required information click  to move the information into the data grid.
After all firearms for this acquisition have been entered, click  to save the firearm(s) records into the Bound Book.
Clicking ![]() will clear the form of any data entered.
will clear the form of any data entered.
Clicking  will clear the form of any data entered and then close the form.
Serial Number Control
The Serial Number Control  has two separate buttons. Clicking
  will generate the next sequential NSN number for acquiring a firearm with no serial number. Clicking
  will open the Add Multiple Serial Numbers dialog.
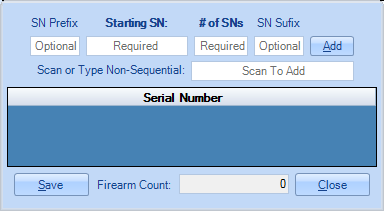
This dialog will allow you to do the following.
1. Specify a Sequence of Serial Numbers by providing Prefix, Starting Serial Number, the number of Serial Numbers to generate, Suffix.
Prefix and Suffix are optional as indicated in the image above.
Once you have provided the above information and clicked the Add button, the generated Serial Numbers will be populated in the Grid control of the dialog. You can double mouse click a record in the Grid to remove it.
2. Scan or Type in Non Sequential Serial Numbers of the same Firearm SKU / UPC / Man Item # to add to the Grid
When you are done adding serial numbers for Duplicate firearms, hit the Save button and you will be returned to the Acquisition Module. Only the first Serial Number in the list will be visible in the Add Firearms section, but when you select the remaining fields of information and hit the Add Firearms button, duplicates of that information for each Serial Number will be added to the Firearms Grid.
Firearm Field Lengths
(Note: Fields in red are required)
Multiple Rifle Requirements
FFL holders in states that border Mexico and that do not have an 07 (Manufacturing) license are required to report multiple sales of certain rifles as defined by the ATF as:
A1. A multiple sale occurs when a licensed dealer or pawnbroker sells or otherwise disposes of, at one time or during any five consecutive business days, more than one semiautomatic rifle capable of accepting a detachable magazine and with a caliber greater than .22 (including .223/5.56 caliber) to an unlicensed person.
FFL Tools will auto generate the multiple rifle report if required only if rifles that meet the requirement are identified when they are acquired. Once a SKU has been specified as meeting or not meeting the requirement, that information is recorded and the user will not be asked again for that SKU. The Multiple Rifle Edit module can be used to change the classification of un-disposed rifles.
When a rifle is acquired without a SKU, or it is a new SKU, the Multiple Rifle Dialog will be displayed.

Click  to classify the rifle as eligible for Multiple Rifle Sale reporting or
  if it is not eligible.