QuickBooks Invoices can be generated using the Disposition Module in FFL Tools via the 4473 (Electronic) and Manual radio buttons. There are several reasons to create a QuickBooks Invoice instead of a QuickBooks Sales Receipt. The most common reason for a face to face transaction is if the customer wishes to use two forms of payment to pay for the purchase.
In this example the Manual Disposition will be used to generate a QuickBooks Invoice. Open Dispositions and select Manual radio button.

Once all the Buyer's and firearm information has been added to the form, the  and
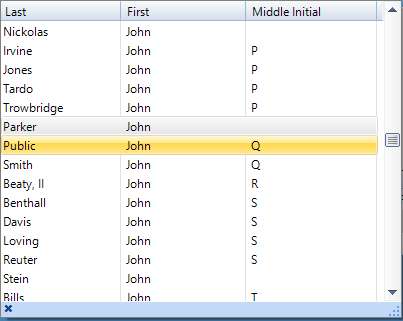
and  are enabled. Click the to start the Invoice process. In this example the FFL Tools Customer has a QuickBooks Customer record but the auto-mapping could not find an exact match so the Customer Not Found Dialog is displayed.

Use the drop down to find and select the QuickBooks Customer to be mapped to the FFL Tools Customer.

Once the selection is made, click the  button to map the FFL Tools Customer to the QuickBooks customer. After the customer is mapped, FFL Tools will check the FFL Tools SKU(s) to see if it or they have been previously mapped to QuickBooks Item Name/Number(s). If the SKU or SKUs have not been mapped, FFL Tools then attempts to perform an "auto-mapping" to find an exact match. If an exact match is not found then the Item Not Found in QuickBooks dialog will display. Information on manually mapping or adding a new QuickBooks Item Name/Number can be found in Generating a Bill. In this example the FFL Tools SKU was created and mapped when the QuickBooks Bill was generated so the Invoice form will display.

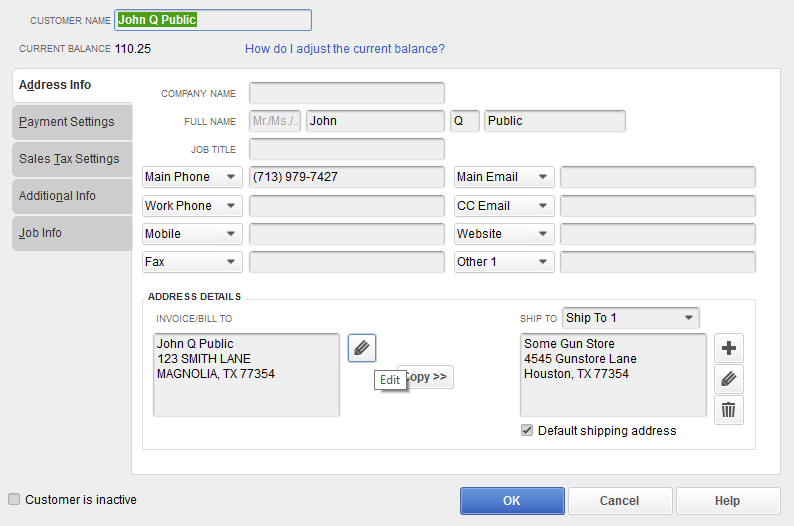
Note that the FFL Tools Customer's name and the QuickBooks Customer's name are the same. The difference between FFL Tools and QuickBooks is the address. John Q. Public has purchased items in the past but has moved recently. When mapping a FFL Tools Customer to a QuickBooks Customer, a mapping record is stored in FFL Tools. FFL Tools will not update existing QuickBooks Customer Information. You will have to manually update the Customer's Information using QuickBooks.
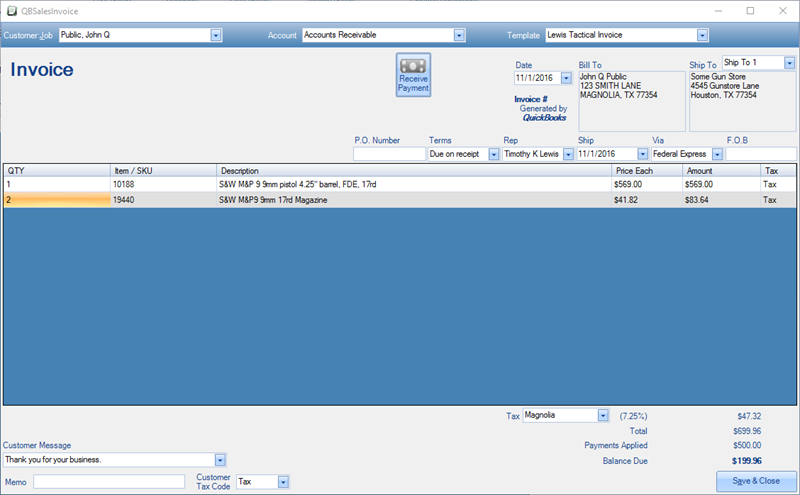
The Customer's name, Invoice Date, Qty, and Item / SKU information are provided by FFL Tools. The Account, Template, Rep, and Invoice Tax will be auto-set using the values that were defined in QuickBooks Options. The Bill To, values in the Ship To drop down, Terms, and Customer Tax Code are provided from the Customer's record in QuickBooks. The Item's Description, Price Each, and Tax are provided by the Item's record in QuickBooks. The Customer Message drop down will contain values that have been defined in QuickBooks. At this point, all information needed to generate the QuickBooks Invoice has been supplied. In this example some additional information is going to be added before the Invoice is generated.
The customer can be changed if necessary by using the Customer Job drop down. Changing the Customer Job here will not change the Disposition information in FFL Tools, nor will it re-map the FFL Tools Customer to the newly selected QuickBooks Customer. If you incorrectly mapped the FFL Tools Customer to the QuickBooks Customer see Manage QuickBooks Mappings to re-map the customer.
Click the Account drop down to change the Account if needed. Here is an exampled showing the AR accounts in our test environment. If you have a default installation of QuickBooks you will only have Accounts Receivable.

In QuickBooks you can define your own Invoice templates. If you wish to use a different template than the one defined in QuickBooks Options then use the Template drop down to select the desired Invoice Template.

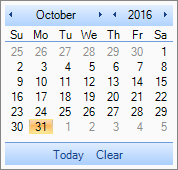
The Invoice Date and Ship dates are defaulted to the date the Invoice is being created. Clicking the down arrow next to the date fields will display an Date Picker that can be used to set the Invoice or Ship dates on the Invoice.
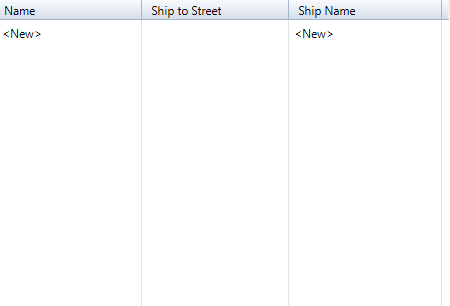
The Ship To drop down will contain values from the QuickBooks Customer record. If there are no values in the Ship To and one is needed use the drop down and select
Once

Enter the Shipping Information. Address Name is the name that will be displayed in the drop down once the Ship To Address is saved.

Once the shipping information has been entered, click the  button. It may take a few seconds for the new shipping address to display on the form. You can cancel adding new shipping information by clicking the
  button.
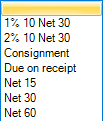
The terms drop down can be used to select the payment terms. Note this field will be filled if Payment Terms have been defined for the customer.
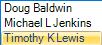
The Rep will be filled in based on the user logged into FFL Tools and the Sales Rep Setting in QuickBooks Options. Use the drop down if you wish to change the Rep for this Invoice.
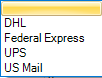
To set the carrier if the Items on the Invoice are going to be shipped, use the Via drop down.
If you wish to set a Customer Message for the Invoice, use the Customer Message drop down

The FFL Tools Invoice form will allow you to add any QuickBooks Item Name/Number that is in your QuickBooks Items. Click the QTY cell for the empty row and type in the quantity that is being purchased. Tab or click to the Item / SKU cell to display the drop down of all the QuickBooks Item Name/Numbers. (Note: FFL Tools Invoice will show all QuickBooks Items of type Inventory, it will allow you to select Items that you have a zero or negative quantity on hand in QuickBooks). In this example two magazines are being added to the invoice.
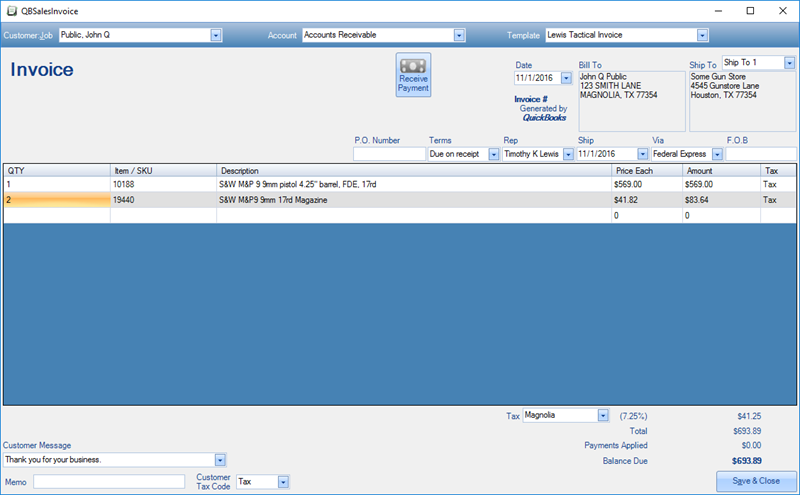
When QTY, Price Each, or Invoice Tax rate are changed, the Invoice's tax due, Total, and Balance Due values will auto-calculate.
Saving the Invoice in QuickBooks can be done via one of two methods, By clicking the  or the
  button. If the button is used then the Invoice is generated in QuickBooks and you will have to use QuickBooks to receive payment. In this example the Receive Payment button will be used to generate the Invoice.
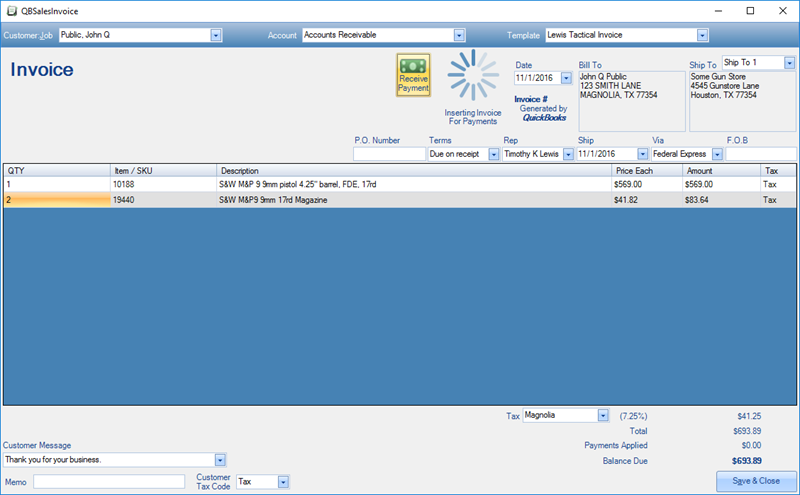
The Invoice is generated in QuickBooks and the Receive Payment dialog is displayed. Note: Once either the or the button has been clicked, the data on the Invoice cannot be changed in FFL Tools and you will need to edit the Invoice in QuickBooks if any changes that are needed.
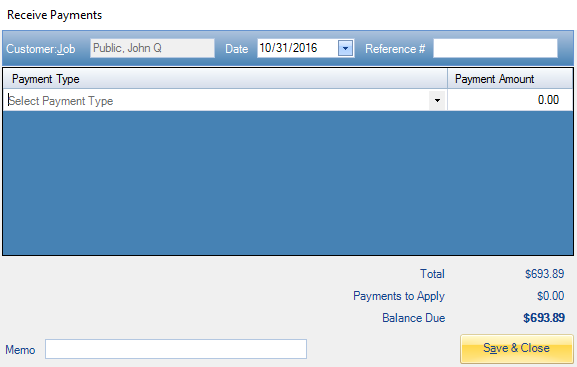
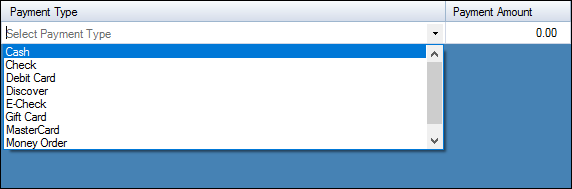
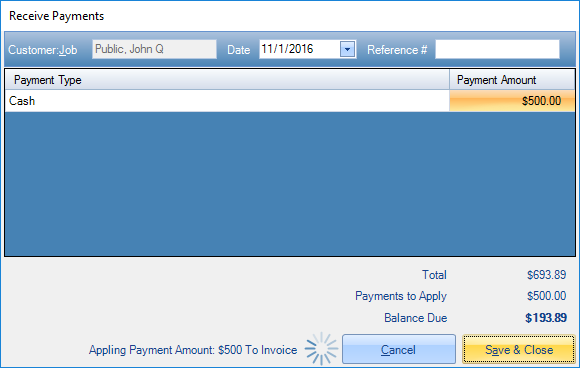
Click the Payment Type drop down and select the payment type being used.
Enter the Payment Amount.
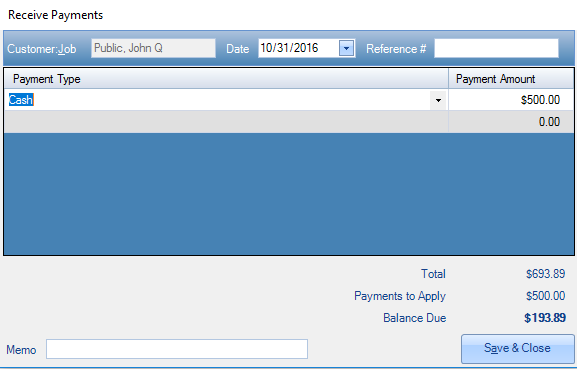
Once the Payment Amount has been entered the Payments to Apply and Balance Due values are updated. You can then add another Payment Type and the Payment Amount until you reach a zero Balance Due. In this case we are only going to accept the Cash payment at this time and click the button.
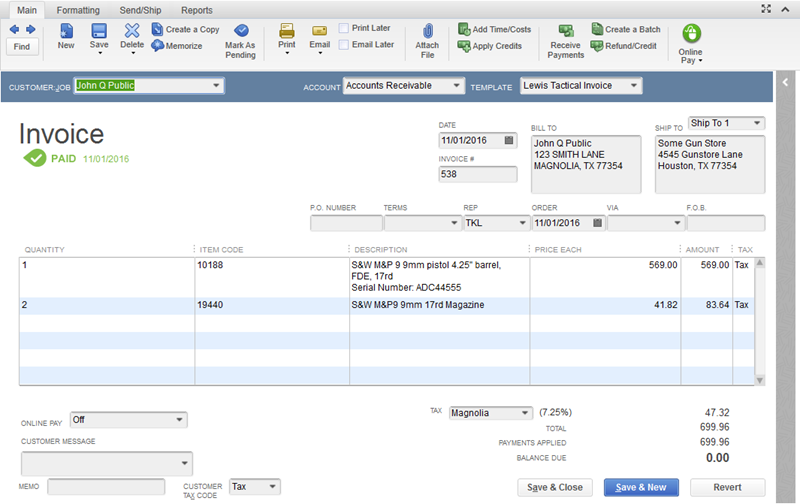
The Receive Payments dialog closes and the Invoice is updated with the Payment Received.
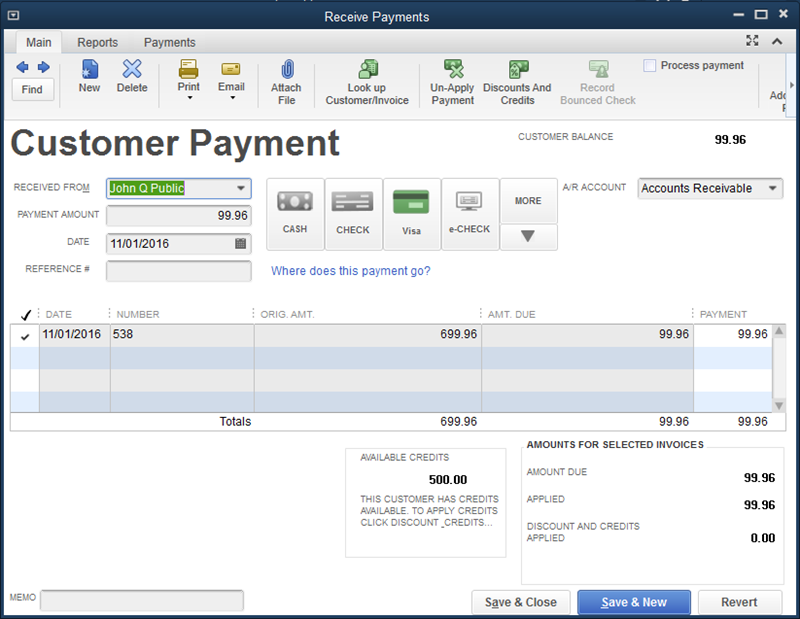
Because there is not a zero Balance Due, the button is still active and can be clicked to receive additional payments for the Invoice.

When the Receive Payment dialog was redisplayed, the Payments Previously Applied is shown.
Select another Payment Type and enter the Payment Amount. The Balance Due is re-calculated with each payment entered. When Balance Due is zero, no more additional payments can be entered.

In the image above we received two payments. After each amount is entered on the form, the Balance Due is re-calculated. Click the button to apply the payment to the Invoice
The Invoice is updated with the new Payment information.

Because there is a zero Balance Due the  button has been disabled. Click to close the Invoice form. The
  will be display and FFL Tools will return to Dispositions. The
  and
and  buttons will be disabled.
Due to the limitation of the QuickBooks API, you must open the Invoice in QuickBooks to print it out.
During the Invoice generation, FFL Tools adds the firearm serial number to the DESCRIPTION column on the Invoice.
The next three images are the Payments applied to the Invoice.
The Cash Payment

The Debit Card Payment

The Visa Payment
Note: FFL Tools does not process payments!
Here is an image of the Customer Record in QuickBooks showing the Shipping Address that was added.