Welcome to FFL Tools
If you have purchased a license thank you for your support. Your feedback will be helpful in extending the application and adding functionality in future releases.
If you are running a trial thank you for evaluating FFL Tools. We hope that the system meets or exceeds your expectations.
Overview
FFL Tools is a Client/Server Windows application that uses a Windows Ribbon style Graphical User Interface (GUI). The Client side is the FFL Tools application. The Server side is a Microsoft MS SQLExpress Database. Both Client and Server can be installed on a single computer, or separate computers. For a business that uses a single license of FFL Tools, it works well on a single computer. If multiple licenses have been purchased and installed, only one computer should have the Server side installed.
It is the goal of this page to help you learn how to navigate within FFL Tools.
Opening FFL Tools
To start the application, click
If the Database connection has not been setup, the SQL Server Selection dialog will be displayed
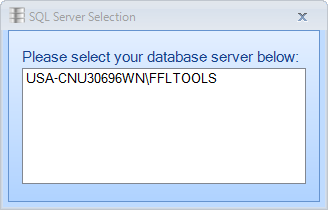
Click the Database server and the application will load.
If your Database Server is not detected, the above form will change to the following representation:
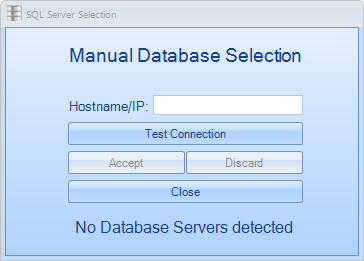
This allows you to type the Hostname or IP Address of your Database Server. You can then click the Test Connection button and if successful the Accept button will be enabled. Click Accept to proceed.
When Microsoft released .NET 4.6, SQL Server Enumeration was broken. This version of .NET is installed on your computer if you upgrade to Windows 10. Upon doing so you will most likely not be able to locate your Database Server. If the Database is installed locally you can type LOCALHOST for the Hostname/IP.
If Security is enabled the FFL Tools Login will be displayed. By default security is disabled.
(Check the First Time Setup (Options) for details on how to enable and disable security)
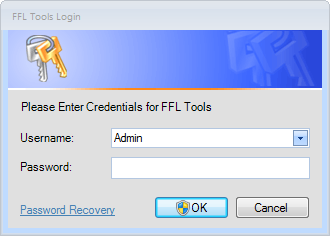
The default password for Admin is l3tm3in! (In a multi user environment it is a good idea to reset the Admin’s password.) Select a user from the drop down list. Information on how to create a new user can be found in Options.
Enter the password for the user.
Click  to login to FFL Tools and the application will open. If you have not answered the Security Questions you will be prompted to do so. Answering 3 security questions will make it possible for you to use the Password Recovery option in the event that you forget a password.
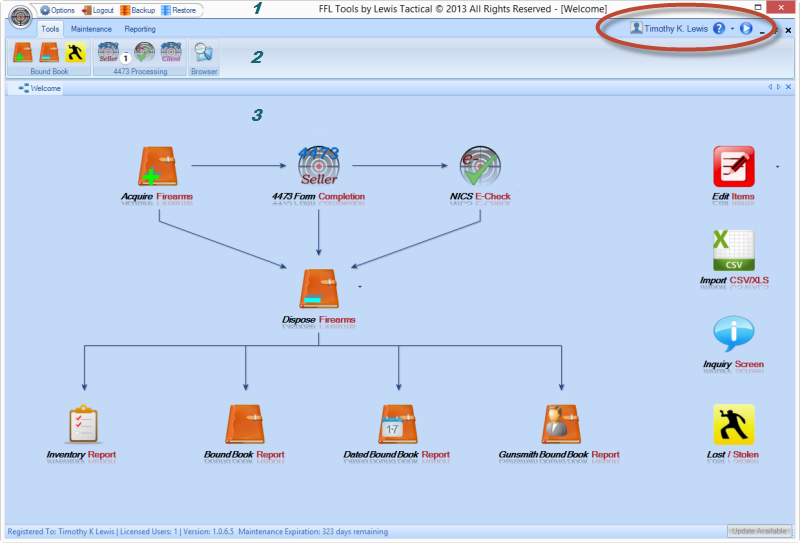
FFL Tools Main Areas
There are three main Areas of FFL Tools.


 acquire firearms
 dispose of firearms
 produce a lost or stolen report
 process 4473 records
 which can be accessed by clicking the down arrow next to the 4473 Seller
 perform background checks
 if in the state of Washington
 if loaded on the computer
 browse documents created by FFL Tools
 allows for the export of customers and vendors
 produce an inventory report
 normal bound book showing all records not delegated to other books
 use this bound book to display records only within a selected date range
 displays only records acquired as type Gunsmith
  if 07 Manufacturer is yes in Store Information section of Options
 if 07 Manufacturer is yes in Store Information section of Options
 allows you to search, sort, filter, group, trace, and show detailed information as well as export data
 a series of charts to graphically display your acquisitions and dispositions
 a report to allow quick resolution of expired vendor status
 a report to group acquired firearms by Vendor or Reference number
3. The tabbed application workspace.
As a module is activated it will be displayed in the tabbed workspace. The tabbed workspace allows for more than one module to be open at the same time. The user can easily move between modules by selecting the open module's tab. When the application first opens the Welcome page will be displayed. The Welcome page contains a layout of navigation buttons in a diagram showing how the different modules of FFL Tools relate to one another. Whenever you click  the Welcome page will be displayed or made active.
Standards Used in FFL Tools
Names and Addresses
Names and Addresses of Vendors and Non Licensed Individuals are saved in the database and displayed in Modules and Reports in UPPER case.
Zip Code Fields
Zip Code fields in the various Modules of FFL Tools are masked to accept the five-four digit zip code. No need to type the dash as the system will put it in if needed. When a zip code is typed the City, State, and County (if on the form) fields are auto filled. Many zip codes have more than one city so the primary city is displayed. Use the City drop down to change the city if required.
Drop Down List
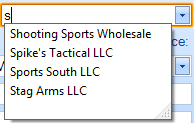
Most of the drop down lists in FFL Tools will narrow the list in the drop down as information is typed into the field. The image below shows that the available vendor names were narrowed to ones that start with the letter "S"
FFL Numbers
FFL Numbers are masked #-##-###-##-#(A-Z)-##### where # denotes a single numeric character. The dashes will be put in by the system and the letter will be capitalized. In the Edit Vendor and Add Vendor Modules, once the FFL number is entered the  button can be pressed to perform an FFL eZCheck.
If 112123121a12345 was entered into FFL Tools it would display as 1-12-123-12-1A-12345. FFL numbers will be displayed in the system and on reports and ATF forms based on the setting used in Options.
Firearm Serial Numbers
Firearm serial numbers are saved in the database and displayed in UPPER case.
Firearm Manufacturer Item #
The Firearm Manufacturer Item number is stored in the database in UPPER case even if entered in lower case. This is a free form field that can hold any value up to 50 characters and is not required but must be unique. The firearm manufacturer item number allows for quick entry of specific firearms into the Bound Book. You may choose to use the Manufacturer's part number/SKU, the UPC Code, or come up with your own number. When using the manufacturer's part number it is possible that two manufacturers may use the same number. If that is the case you could add something to identify the manufacturer. As an example for a Smith & Wesson M&P9 with manufacturer part number of 109201 you could put SW109201 to ensure there are no duplicate firearm Manufacturer Item numbers in the system.
Firearm Types
FFL Tools uses the firearm types that have been defined by the ATF which are:
Listed in the order they will display in the Acquisition's Firearm Type drop down list
Dates
Dates in all Modules default to the current date for each transaction. The date that the information is entered into the system is not recorded. Example: A firearm was physically received on Jan. 3rd, but the acquisition was done on Jan. 5th. In the Acquisitions Module the date was changed to Jan. 3rd. Jan. 3rd is the only date that is recorded. Per ATF rules the FFL has seven days to enter transaction information into the Bound Book. NOTE: Multiple handgun sales must be reported by close of business on the day the multiple sales took place.
In the upper right hand area is the following  . Starting on the left we have the Notifications button. The button graphic is modified
 ![]() whenever you have existing notifications. A tool tip for the button displays the total count, and unread count of Notifications. To the right of the "person icon" there will be and indication showing the users currently logged in. Clicking
whenever you have existing notifications. A tool tip for the button displays the total count, and unread count of Notifications. To the right of the "person icon" there will be and indication showing the users currently logged in. Clicking ![]() help (this file) will be displayed for the active module. By clicking the down arrow to the right of the
help (this file) will be displayed for the active module. By clicking the down arrow to the right of the ![]() an extended help menu
an extended help menu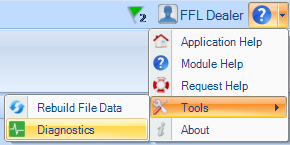 will display. If the
  item is clicked, an application will load that allows FFL Tools Support personnel to remotely connect to the computer to provide support.
Clicking  opens up the Product Information dialog.
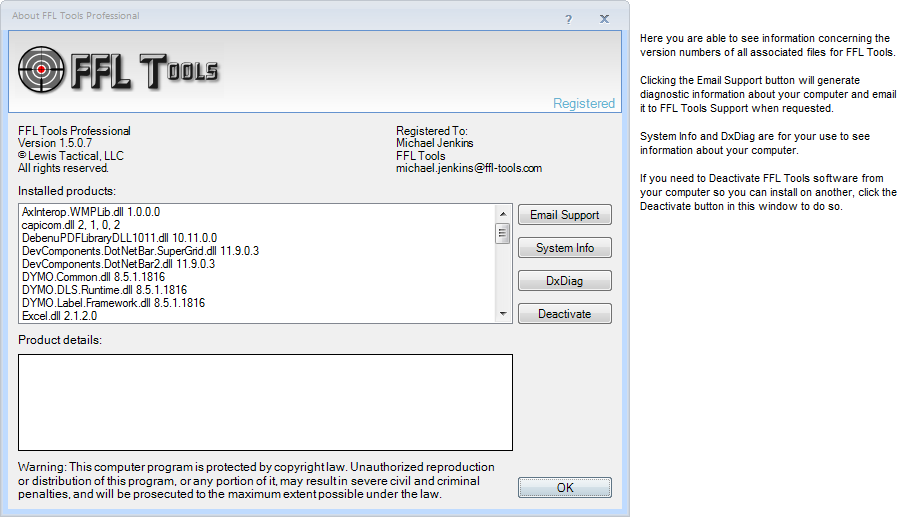
Video Coach will be activated when the  is clicked. Video Coach requires and active Internet connection and will be grayed out if one is not present.

The left side of the bar displays the registered user of FFL Tools, the number of licenses, version, and the number of days of support remaining.
When started, FFL Tools will check for updates. If a newer version is available the update will be downloaded in the background. The Update Available button in the bottom display bar will be enabled. Just click  and the update will be installed. Or if an update exists it will be installed when FFL Tools starts.
When there are 30 days or less of support remaining, the  button will appear. Click this button to renew Maintenance and Support for FFL Tools.